| (Aren't my desktop colors
pretty ^.^) After joining a channel, and setting up all the font
or DCC settings to your liking, you should start up a file serverr.
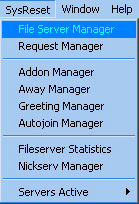
First, click SysReset. A menu pops up, with a couple of options.
Click "File Server Manager". After selecting it, a Menu will pop
up. This menu has everything to do with your File Server on it.
Leave the other items on the menu for now. |
 |
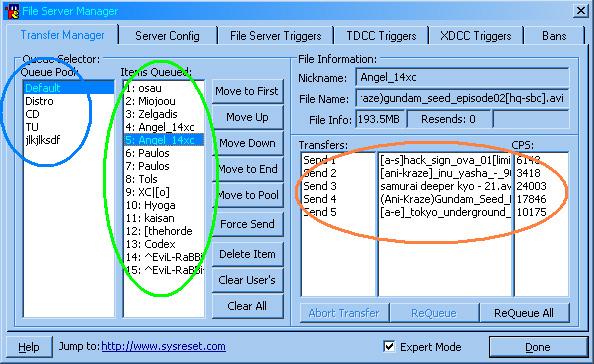
Step 1
This menu tells you your sends
and queues, for each queue pool. Where the Blue circle is, is the
different Queue Pools you have. Usually there is only one, the Default
Pool. Where the Green circle is, are the items queued. Where the
Orange circle is, are the number of sends going at the moment. The
commands you can do for each are so self explanatory I'm not even
gonna talk about it. Well.. Requeue means that you put the file
back into the queue pool. (Some people might not understand that...)
Also, it is a good idea to select Expert Mode if you know what you
are doing, and don't want to see annoying pop ups again. Now, click
the Server Config Tab. |
|
 |
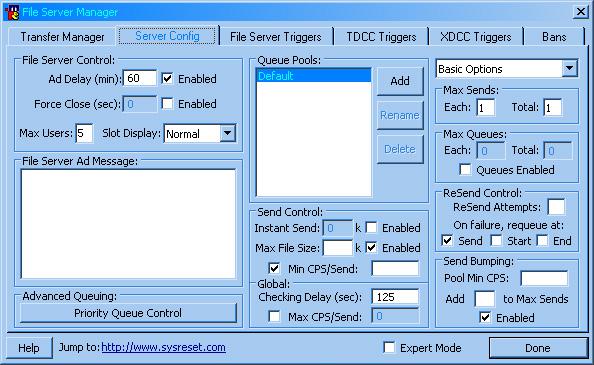
Step 2
Now inside Server Config, there
are a couple options. Most are self-explanatory, but I'll explain
anyways. Under File Server Control, Ad Delay specifies how long
it takes for the File Server ad to appear again after each advertising.
This should usually be a high number like 300, (5 minutes) so that
it will not "spam" the channel. Ignore "Force Close"
for now. Where File Server Ad is, is the message that is attached
to your whole ad. Put something like what you have inside, what
your rules are, etc. Where Max Sends is, choose the number of sends
you want to be sending in total, and the number of sends you want
to send to one user at a time. If you want to have queues, select
Queues Enabled, and choose the number of queues for each user, and
the total number of queues. |
|
 |
Step 3
Now, select where Basic Options
is, and select Advanced Options. This is where you choose the two
colors your ad has. Select a color in "First Color", and
"Second Color". Then, where Advanced Fileserver is, choose
the options you wnt to use. (They're self explanatory once you get
to know what SysReset is like) Important: if you
use a router, or a firewall, select Firewall workaround
and enter a n open port (usually 59). Firewall workaround is one
of the best features ever to happen to a File Serve script for many
people. Inside Advanced Settings, you may notice Clone Protection
and wonder waht that is. Clones are 2 mIRC clients from the same
user on at the same time. If it is enabled, it will tell you which
ones are clones, and when they come on. You can choose what goes
on your ad inside Statistics Gathering. |
|
 |
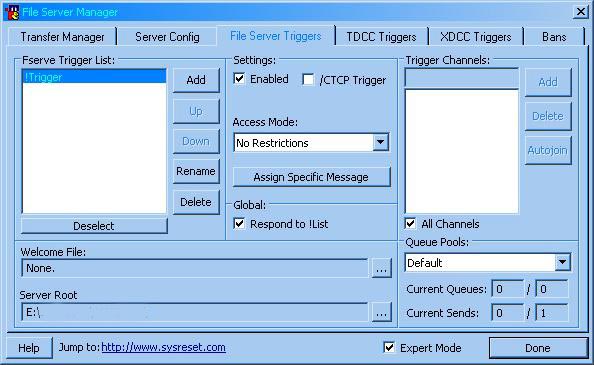
Step 4
Next, click the File Server Triggers
tab. To add a trigger, click "Add" in Fserve Trigger List.
Now, type what you want your trigger to be. If you want a silent
CTCP trigger, just type in what you want after the ( /ctcp user
) of the trigger you want. (Just select "/CTCP Trigger"
later for silent trigger) For welcome file, if you want one, select
a txt file that you made. Or else just click cancel. Now, select
the folder you want users to start up on. Then, click OK. There's
your first trigger. Select Enable to enable the trigger. Also make
sure that Respond to !List is checked. Under Queue Pools, select
the queue pool you want the trigger to use. Usually this is Default.
If you don't want the trigger to work in all channels, uncheck "All
Channels", then put a channel at the top, then click "Add".
You should leave Access Mode for now. |
|
 |
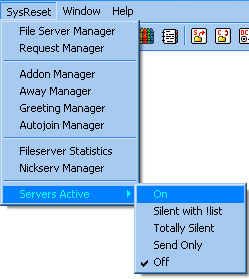
Now, click "Done".
Open the SysReset menu, go to servers active, and select "On".
If you ever want to show your ad, right click the channel, select
Force Advertise, and select Fserve [This Chan]. If your Fserv is
set to either "Silent with !list" or "Totally silent",
users can still type your trigger to get on. But silent means no
ads ever popping up, and you can not force advertise. And "Totally
Silent" means that they can not even view your ad when they
type !List. Oh well, pick the option that you like most. Or, if the channel has
rules about this, use the option that applies to the rules best (usually silent with !list). Anyways,
congratulations, you are now promoted from "Leecher" to
"Not a Leecher"! |
 |
|

